Last Updated: March 31, 2026
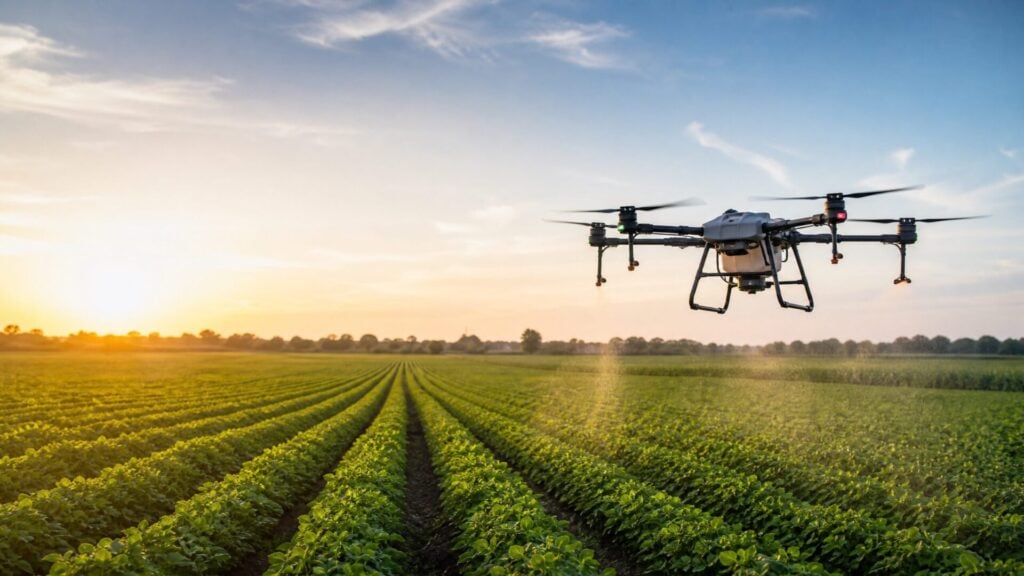
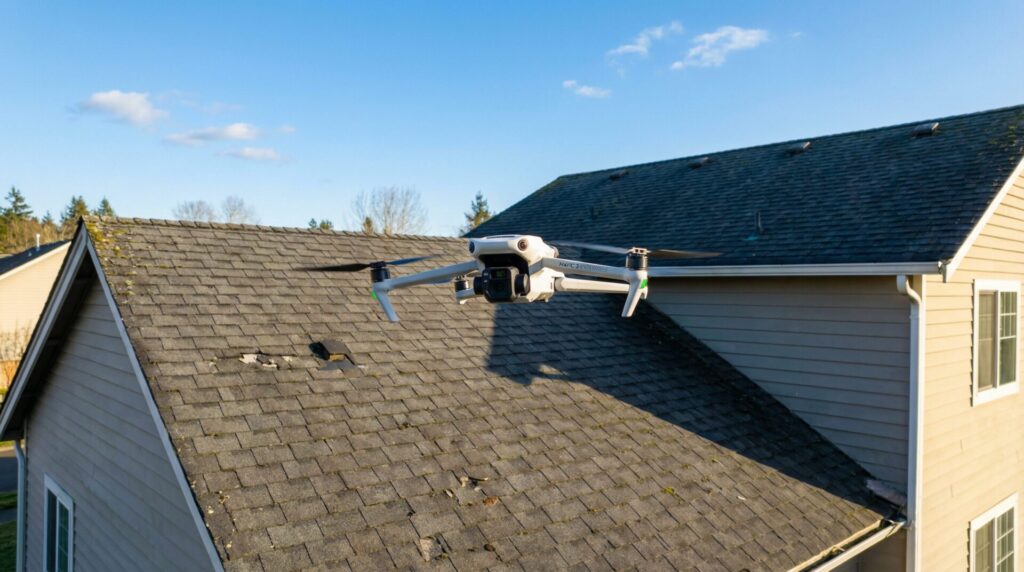
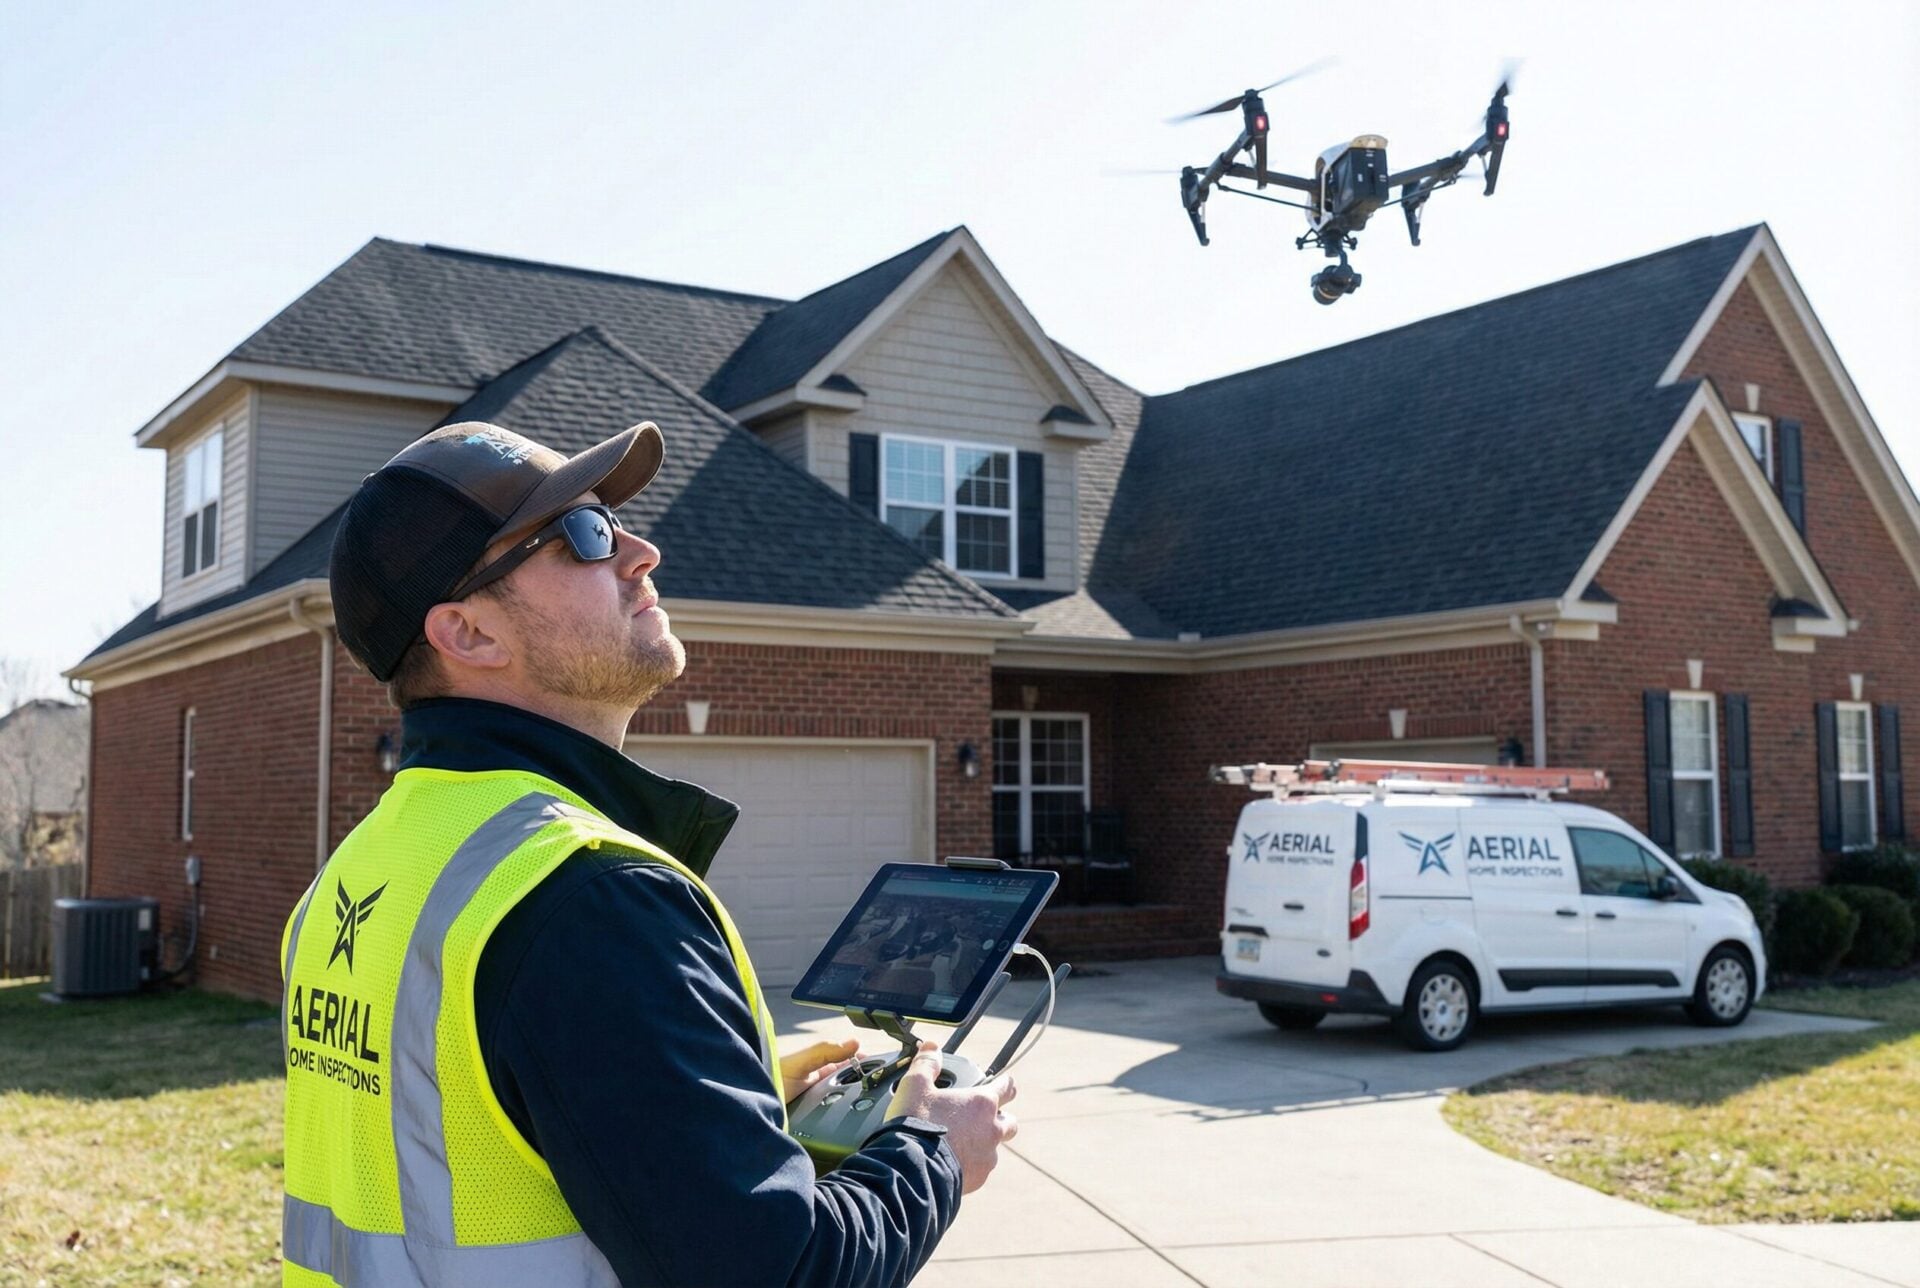
Drone roof inspections have replaced ladders and scaffolding for thousands of roofers, adjusters, and home inspectors across the United States. A drone roof inspection uses an FAA-certified pilot to fly a camera-equipped drone over a roof, capturing high-resolution photos and video to assess damage, wear, and structural issues — typically in 30 to 60 minutes for $150 to $400.
At Drone Launch Academy, we’ve trained thousands of pilots who now offer drone roof inspections as a core service. Whether you’re a homeowner wondering if you should hire a drone pilot, a roofing contractor looking to modernize your workflow, or an aspiring drone entrepreneur ready to launch an inspection business, this comprehensive guide covers everything you need to know for 2026.
- Drone roof inspections cost $150 to $400 for residential properties and $500 to $1,500+ for commercial buildings.
- Inspections take just 30 to 60 minutes, compared to the 2 to 4 hours required for traditional manual inspections.
- You must hold an FAA Part 107 Remote Pilot Certificate to offer drone inspections commercially.
- The best drones for the job include the DJI Mavic 3 Enterprise, DJI Mini 4 Pro, and Autel EVO II Dual.
- Insurance companies increasingly accept and even prefer drone inspection reports for claims processing.
What Is a Drone Roof Inspection and How Does It Work?
A drone roof inspection is a method of evaluating a roof’s condition by flying a camera-equipped drone over and around the structure. The drone captures high-resolution photos, 4K video, and sometimes thermal imagery that a certified pilot or inspector then analyzes to identify damage, leaks, and wear.
The process is remarkably straightforward but requires precision and planning. First, the pilot conducts a pre-flight assessment, checking airspace restrictions using LAANC (Low Altitude Authorization and Notification Capability) and evaluating weather conditions. Once cleared, the pilot launches the drone and follows a systematic flight path.
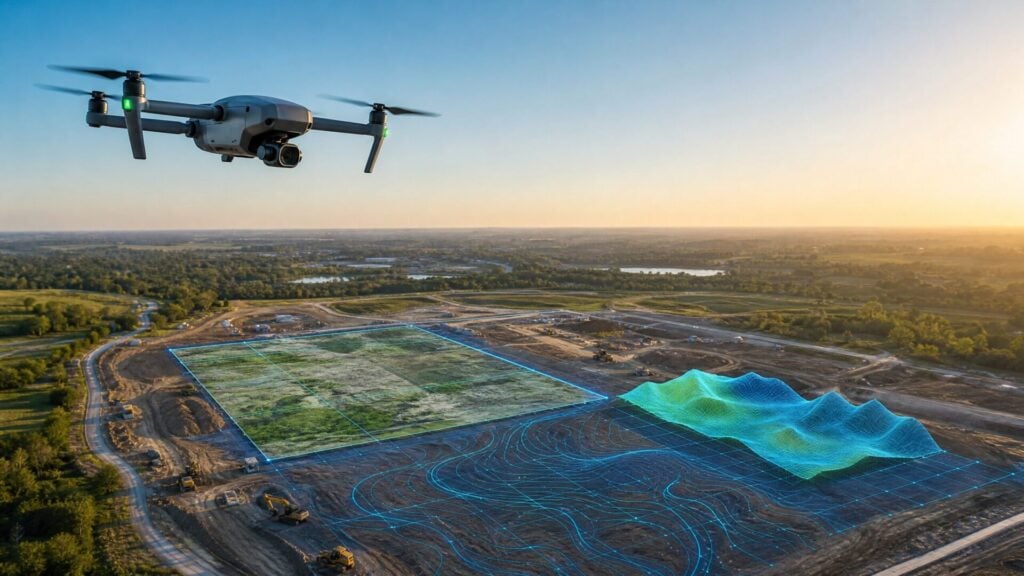
Instead of randomly flying around, professional inspection pilots use automated mapping software to fly precise grid patterns. The drone’s camera points straight down (nadir) to capture a complete map of the roof, followed by angled (oblique) shots to inspect the chimney, gutters, flashing, and parapet walls.
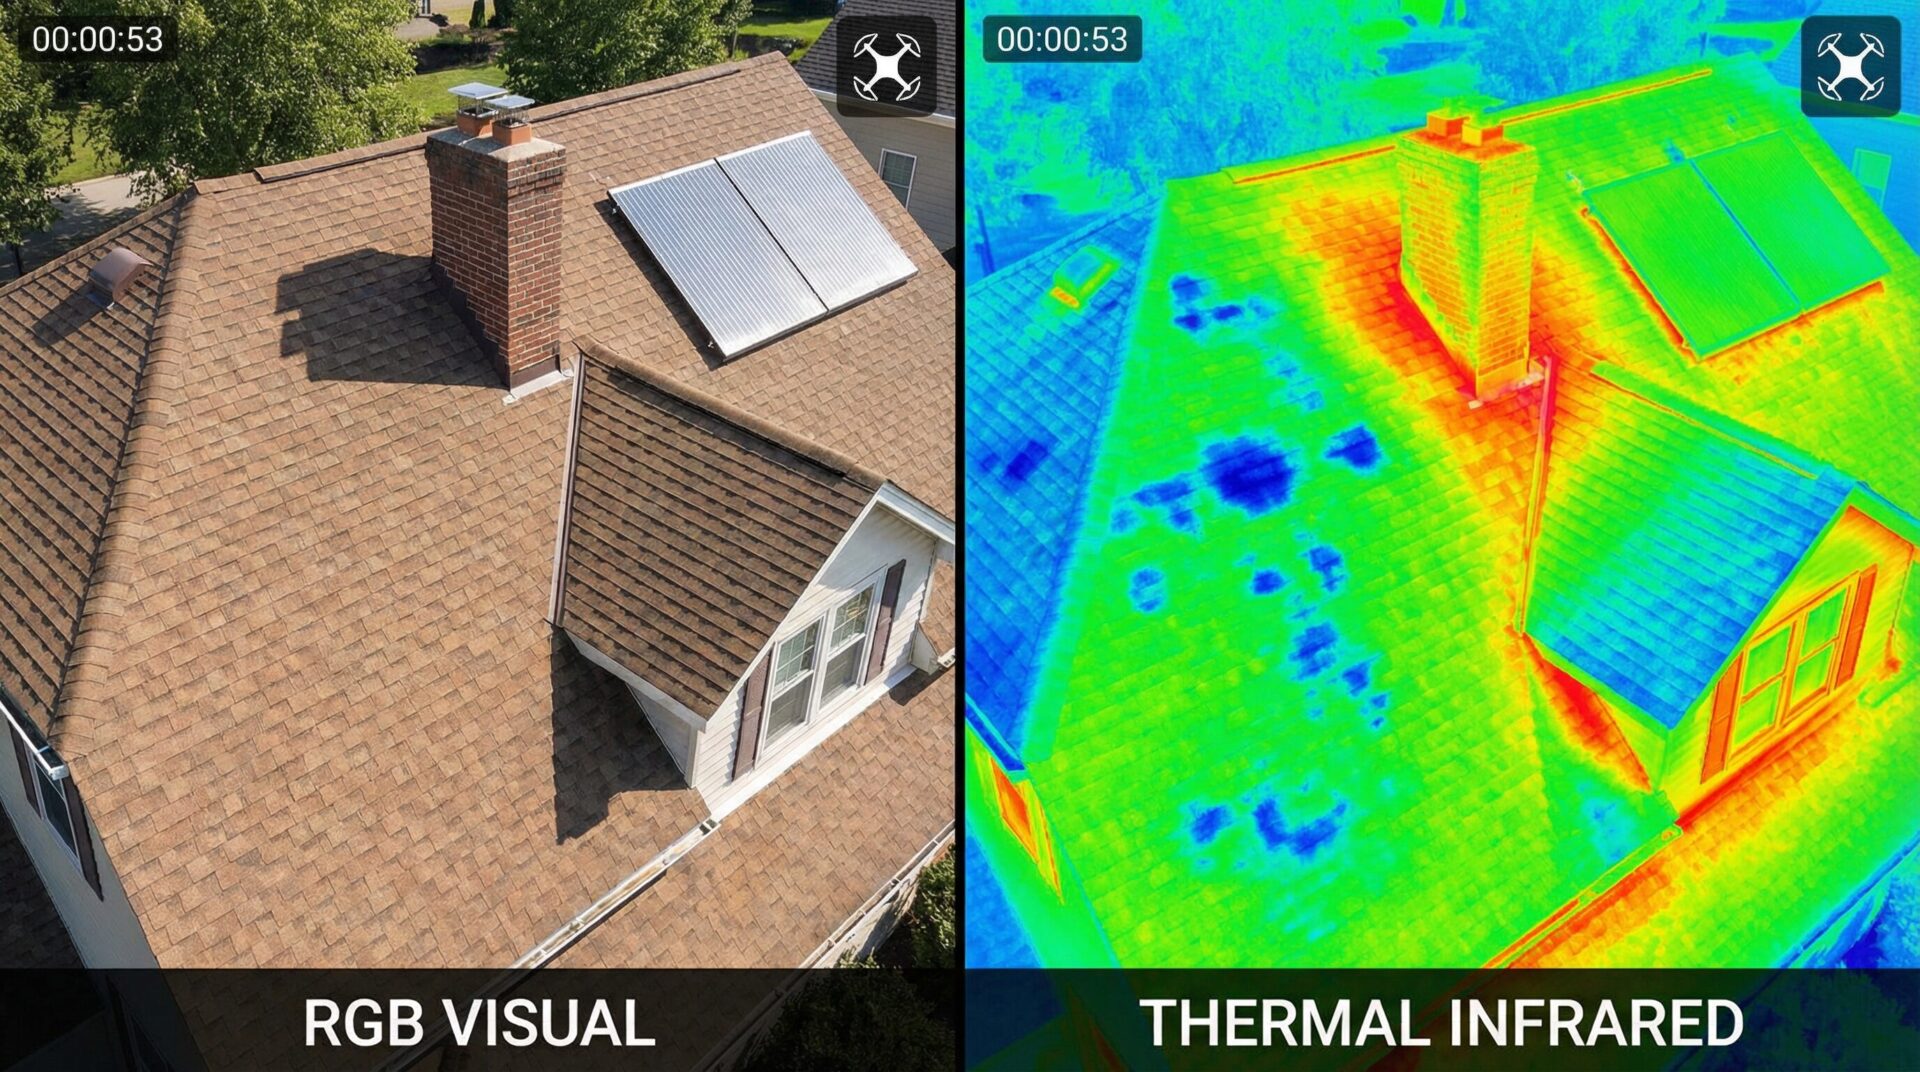
During the flight, the drone collects various types of data. Standard RGB (red, green, blue) photos capture visible damage like missing shingles, cracked tiles, or granular loss. Advanced inspections utilize thermal imaging to detect temperature differences, which can reveal trapped moisture under the roof membrane or areas with poor insulation. Finally, the software stitches these images together to create high-resolution 2D orthomosaics and 3D models.
David Young, founder of Drone Launch Academy, notes that the most successful inspection pilots combine their flight skills with a solid understanding of roofing anatomy. “You don’t just need to know how to fly the drone,” Young explains. “You need to know what you’re looking at when you review the footage. Being able to spot the difference between normal wear and tear and actual storm damage is what makes you valuable to roofers and insurance adjusters.”
How Much Does a Drone Roof Inspection Cost in 2026?
A standard residential drone roof inspection costs between $150 and $400 in 2026. Commercial properties run $500 to $1,500 or more depending on building size and complexity. Adding thermal imaging typically costs an extra $100 to $200 per inspection.
When budgeting for a drone roof inspection, several factors influence the final price. The primary driver is the size and complexity of the roof. A simple 2,000-square-foot gable roof takes far less time to fly and process than a 10,000-square-foot commercial flat roof with multiple HVAC units and complex geometry.
Location also plays a role, with prices naturally skewing higher in major metropolitan areas with a higher cost of living. However, the most significant variable is the level of deliverables required. If you simply need a folder of raw, high-resolution photos to review yourself, the cost will sit at the lower end of the spectrum. If you require a fully processed 3D model, AI-assisted damage detection, and a comprehensive PDF report, the price will increase accordingly.
| Inspection Type | Price Range | Typical Duration | What’s Included |
|---|---|---|---|
| Basic Residential (Visual Only) | $150–$300 | 30–45 min | HD photos, basic damage report |
| Residential + Thermal | $300–$500 | 45–60 min | HD photos, thermal scan, detailed report |
| Commercial (Small) | $500–$1,000 | 1–2 hours | Full photo set, measurements, 3D model |
| Commercial (Large/Complex) | $1,000–$1,500+ | 2–4 hours | Comprehensive survey, orthomosaic, thermal |
For those looking to start a drone inspection business, pricing your services correctly is crucial. Many beginners make the mistake of charging too little, failing to account for travel time, equipment depreciation, software subscriptions, and insurance costs. A common pricing strategy among Drone Launch Academy alumni is to establish a base rate (e.g., $195 for up to 3,000 square feet) and charge an additional fee per square foot beyond that threshold.
What Are the Benefits of Drone Roof Inspections vs. Traditional Methods?
Drone roof inspections are safer, faster, and often more thorough than traditional ladder-based inspections. They eliminate fall risk, reduce inspection time by 50 to 70 percent, and capture data that human eyes might miss — especially with thermal cameras that detect moisture and insulation problems invisible to the naked eye.
Safety is the most compelling reason the roofing and insurance industries are adopting drone technology. According to OSHA statistics, falls remain the leading cause of death in the construction industry, with roof falls accounting for a significant portion. By keeping the inspector safely on the ground, drones completely eliminate this risk. There is no need for ladders, scaffolding, or walking on steep, slippery, or fragile surfaces like old slate or clay tiles that could break under a person’s weight.
Speed and efficiency represent another massive advantage. A traditional roof inspection can take two to four hours, requiring the inspector to climb up, carefully navigate the surface, take photos with a smartphone or point-and-shoot camera, climb down, and then spend hours writing a report. A drone can capture comprehensive data for the same roof in 30 to 60 minutes.
| Factor | Drone Inspection | Traditional Inspection |
|---|---|---|
| Safety | No ladder/roof access needed | Fall risk, OSHA concerns |
| Time | 30–60 minutes | 2–4 hours |
| Cost | $150–$400 | $200–$600 |
| Data Quality | 4K photos, thermal, 3D models | Visual notes, limited photos |
| Weather Limitations | No rain, wind <20 mph | Rain, ice, extreme heat |
| Hard-to-Reach Areas | Full coverage | May miss steep/high areas |
| Documentation | Digital, shareable, archivable | Paper-based, limited |
Furthermore, the quality of documentation provided by a drone is vastly superior. A drone captures the entire roof in high resolution, creating a permanent digital record of the roof’s condition at that exact moment in time. This is invaluable for insurance claims, where adjusters can zoom in on specific shingles to verify hail or wind damage without ever visiting the property.
However, drones do have limitations. They cannot fly in heavy rain or high winds (typically anything over 20 mph), and they cannot physically lift a shingle to check the underlayment or feel the decking for soft spots. In cases where tactile verification is necessary, a hybrid approach — using the drone for the bulk of the inspection and only climbing the roof for specific spot checks — is the best practice.
What Equipment Do You Need for Drone Roof Inspections?
At minimum, you need a reliable camera drone with at least a 1-inch sensor (like the DJI Mavic 3 or DJI Mini 4 Pro), a tablet or controller with live view, spare batteries, and inspection reporting software. For advanced work, add a thermal camera drone like the DJI Mavic 3 Enterprise or Autel EVO II Dual 640T.
The drone you choose will dictate the types of inspections you can perform and the clients you can attract. For residential visual inspections, you don’t need a $10,000 enterprise rig. The DJI Mini 4 Pro is an excellent entry-level option that shoots 48-megapixel photos and 4K video, all while weighing under 250 grams. Our students at Drone Launch Academy typically start with a prosumer model like this to build their initial client base and generate revenue before upgrading.
As your business grows, especially if you want to target commercial properties or offer thermal imaging, you will need to invest in enterprise-grade equipment. The DJI Mavic 3 Enterprise (M3E) has become the industry standard for mapping and visual inspections, featuring a mechanical shutter that prevents motion blur during fast mapping flights. If you want to offer thermal inspections to detect trapped moisture or HVAC leaks, the DJI Mavic 3 Thermal (M3T) or the Autel EVO II Dual 640T V3 are the top choices.
Beyond the drone itself, you need a professional kit. This includes at least three to four spare batteries, a multi-battery charging hub, a high-visibility landing pad, a hard-shell carrying case, and ND (Neutral Density) filters to manage glare on bright, sunny days. You will also need a dedicated tablet or a smart controller with a bright, built-in screen to run your flight apps and view the live feed clearly outdoors.
How Do You Get Into Drone Roof Inspections as a Business?
To start offering drone roof inspections commercially, you need three things: an FAA Part 107 Remote Pilot Certificate, a capable drone with a good camera, and liability insurance (typically $1 million coverage). From there, you’ll want to build relationships with roofing companies, insurance adjusters, and real estate professionals.
Getting your Part 107 license is the mandatory first step. Any time you fly a drone for commercial purposes — which includes inspecting a roof for a fee or as part of a business operation — the FAA requires you to be certified. The test covers airspace regulations, weather, drone performance, and safety protocols. Drone Launch Academy’s Part 107 prep course has helped thousands of students pass this exam on their first try.
Once licensed, you need to acquire your equipment and, crucially, drone liability insurance. Even the best pilots can experience flyaways, bird strikes, or hardware failures. Carrying a minimum of $1 million in liability insurance protects you and provides peace of mind to your clients. Policies typically cost between $500 and $1,500 annually, though pay-per-flight options are available for beginners.
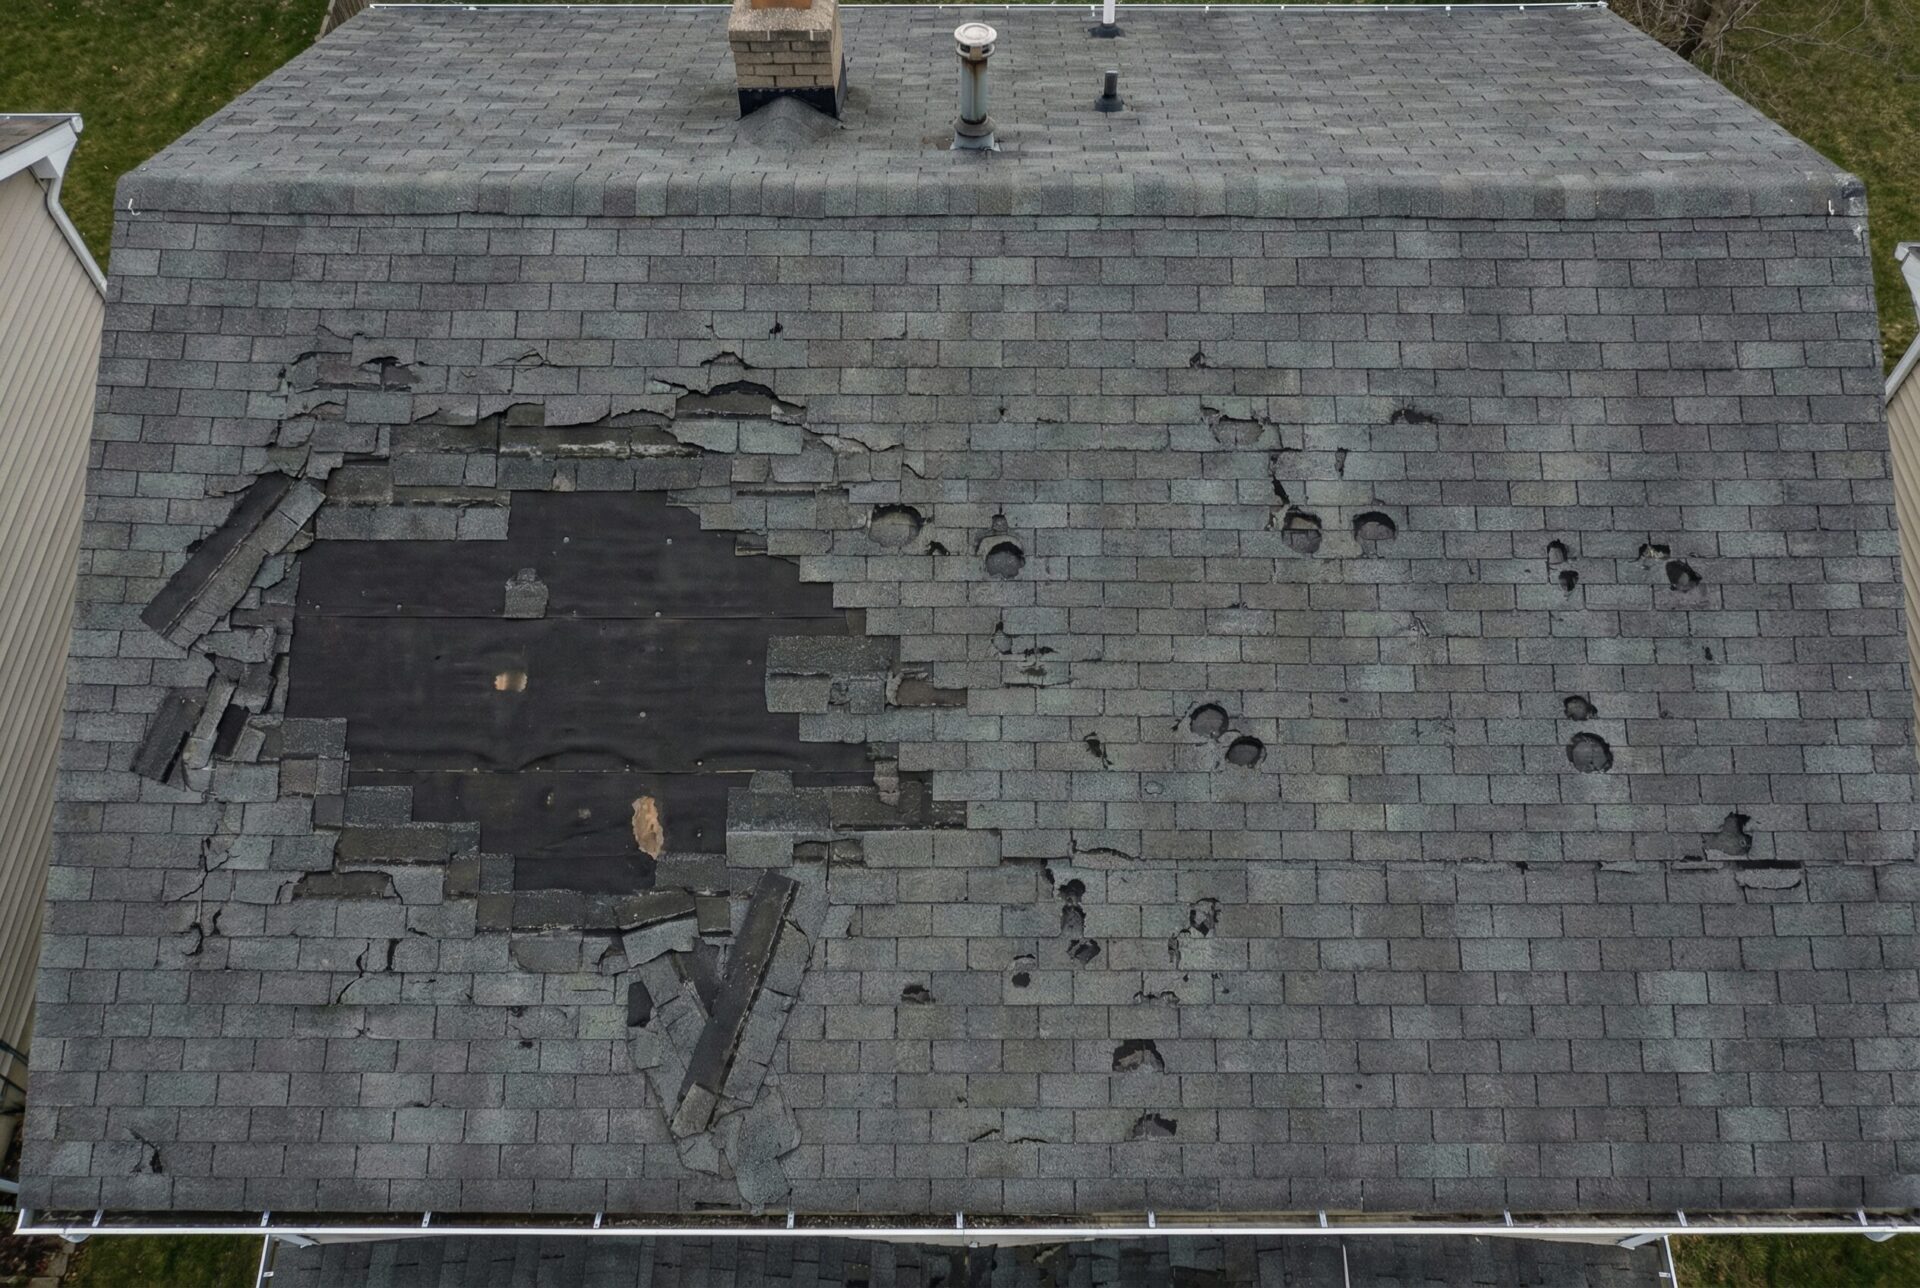
With your legal and operational bases covered, you need to learn the subject matter. You don’t need to be a roofer, but you must understand basic roof anatomy — ridges, valleys, flashing, drip edges, and underlayment. You also need to know what common damage looks like from the air, such as hail strikes (which look like dark, bruised spots where granules are missing) versus natural blistering.
Finally, you need to market your services. Start by building a portfolio: offer to inspect the roofs of friends, family, and your own home for free to generate sample reports. Then, approach local roofing companies. Many roofers hate climbing ladders and will gladly outsource the initial inspection phase to a reliable drone pilot. You can offer your services on a per-inspection basis or negotiate a monthly retainer for a set number of flights.
What Are the FAA Rules for Drone Roof Inspections?
All commercial drone roof inspections in the US require an FAA Part 107 Remote Pilot Certificate. You must also comply with Remote ID requirements, fly below 400 feet above ground level (AGL), maintain visual line of sight with your drone at all times, and check for airspace restrictions using LAANC before every flight.
The Part 107 requirement is non-negotiable. If you are a roofer buying a drone to inspect your own clients’ roofs, you need a Part 107 license. If you are a freelance pilot hired by an insurance company, you need a Part 107 license. Operating without one can result in severe fines from the FAA.
Airspace authorization is another critical component. Many residential neighborhoods and commercial districts are located in controlled airspace near airports. Before launching your drone for an inspection, you must check an FAA-approved app to see if you need authorization. If you do, you can usually request and receive it instantly through the LAANC (Low Altitude Authorization and Notification Capability) system.
As of early 2024, the FAA also strictly enforces Remote ID compliance. Remote ID acts as a digital license plate for your drone, broadcasting its identification and location information. Most modern drones, including the DJI Mini 4 Pro and Mavic 3 series, have Remote ID built-in, but you must ensure it is activated and functioning during your inspection flights.
What Software Do You Use for Drone Roof Inspection Reports?
The most popular drone roof inspection software platforms in 2026 include DroneDeploy, Pix4D, and DJI Terra for mapping and modeling, plus specialized tools like Roof Report Pro and Kespry for automated damage detection and report generation.
Capturing the photos is only half the job; turning those photos into a usable, professional deliverable is what clients actually pay for. For basic visual inspections, you might simply organize the high-resolution images into clearly labeled folders (e.g., “North Elevation,” “Chimney Flashing,” “Suspected Hail Damage”) and provide a summary PDF.
However, professional inspection businesses rely on automated software to create orthomosaics (large, highly detailed maps made by stitching hundreds of photos together) and 3D models. DroneDeploy remains the industry leader for its ease of use and cloud-based processing. You simply plan the flight on your tablet, the drone flies the pattern automatically, and you upload the images to the cloud where DroneDeploy creates the 3D model and measurement reports.
In 2026, AI-powered damage detection is becoming standard. Platforms like EagleView and specialized inspection software can now automatically analyze your drone imagery to highlight suspected hail hits, missing shingles, and granular loss, drastically reducing the time you spend manually reviewing footage.
Frequently Asked Questions About Drone Roof Inspections
How much does a drone roof inspection cost?
A professional drone roof inspection typically costs between $150 and $400 for a standard residential home. Commercial properties and complex structures usually range from $500 to $1,500 or more, depending on the size and whether thermal imaging is included.
Can you inspect a roof with a drone?
Yes, drones equipped with high-resolution cameras can inspect roofs safely and thoroughly without anyone climbing on the structure. They capture detailed photos, 4K video, and thermal data that reveal damage, wear, and leaks.
How long does a drone roof inspection take?
Most residential drone roof inspections take 30 to 60 minutes. This includes setting up the equipment, checking airspace, flying the automated grid pattern, and capturing manual detail shots of specific features like chimneys and gutters.
Do you need a license to do drone roof inspections?
Yes, any commercial drone operation in the United States, including roof inspections performed for a business or for profit, requires the pilot to hold an active FAA Part 107 Remote Pilot Certificate.
Do insurance companies accept drone roof inspections?
Yes, most major insurance companies now accept drone inspection reports. In fact, many large insurers employ their own fleets of drone pilots or contract with networks of certified pilots to process claims faster and safer.
What is the best drone for roof inspections?
The DJI Mavic 3 Enterprise is widely considered the best overall drone for professional roof inspections due to its mechanical shutter and mapping capabilities. For beginners or those on a budget, the DJI Mini 4 Pro is an excellent starting point.
How do I start a drone roof inspection business?
To start a business, you must first pass the FAA Part 107 exam to get your commercial license. Then, purchase a quality camera drone, obtain aviation liability insurance, practice your flight skills, and begin networking with local roofing contractors and insurance adjusters.
Are drone roof inspections accurate?
Yes, modern drones capture incredibly accurate data. High-resolution cameras can zoom in to show granular loss on a single shingle, while thermal cameras can detect trapped moisture under the roof membrane that a human inspector walking the roof would completely miss.
Conclusion
Drone roof inspections have revolutionized how we assess property damage, offering a safer, faster, and more detailed alternative to traditional ladder-and-boots methods. Whether you’re paying $150 to $400 for a residential inspection or building a business charging commercial clients, the value proposition is undeniable.
If you’re ready to turn your drone into a revenue-generating tool, getting your Part 107 license is your first step. At Drone Launch Academy, our comprehensive training programs not only help you pass the FAA exam but also teach you the business skills needed to secure your first paying inspection clients. With the right training and equipment, the sky truly is the limit for your drone inspection business.
Want to offer professional roof inspection services?
Roof inspection is one of the most accessible drone service niches because the client base is large and the barrier to entry is relatively low. Drone Launch Academy’s Aerial Roof Inspection Pro teaches the inspection workflow, deliverables, safety considerations, and client communication skills you need to offer this service professionally.
Download the Drone Inspection Starter Checklist
Use this checklist to compare inspection niches, understand required skills, identify client types, and plan your first inspection-service offer. It is designed for pilots evaluating roof, solar, tower, bridge, power line, and wind turbine opportunities.
Want to learn the solar inspection workflow instead of guessing?
Solar inspection work requires more than basic flight skills. You need to understand what data to collect, how to plan a site visit, and how to deliver information solar and roofing clients can use. Drone Launch Academy’s Solar Roof Inspection Pro teaches the process for pilots who want to add solar inspection services.
Professional drone inspection work is not just about capturing images. It is about understanding what the client needs, planning a safe mission, collecting the right data, and delivering results that help someone make a decision. If this niche sounds like a fit, the next step is to build both your technical skill and your client-acquisition plan. Start with the inspection-related training in Drone Launch Academy’s Aerial Roof Inspection Pro, then explore Solar Roof Inspection Pro to expand into the adjacent solar niche.